Your First Optimization
Congratulations on creating your first project! Now that you've set up your project, it's time to create your first variable and variations to start your first optimization.
Next Steps
Your next steps depend on your installation method. If you installed the JavaScript Snippet or the JS Browser SDK and are using the Visual Editor, you can start making visual changes to your website without writing any code. If you prefer using ezbot predictions in your code, you'll need to create a basic variable and use these predictions to make changes.
Create a Variable
Basic Variable
Basic variables are simple to create but must be used in your code.
To create a basic variable, follow these steps:
- Click on the Variables tab in the left-hand menu.
- Click the Create Variable button.
Anatomy of a Basic Variable
- Human Readable Name: Choose a name that is easy to understand.
- Variable Key: This is the name you'll use in your code. It should be all lowercase and contain no spaces.
- Add Allowed Values: Add the values you want to test. For example, if testing button colors, you could add "red," "blue," and "green" as allowed values.
- Default Value: Select the default value for your variable. This value will be used for users in the holdback group and will be explored for users in the optimized group. The default variable is indicated by a checkmark.
Visual Variable
Visual variables can be created using the Visual Editor or by clicking on the Variables tab in the left-hand menu, followed by the Create Variable button, and then selecting Visual Variable.
We recommend using the Visual Editor to create, edit, and delete visual variables.
Visual Editor
The Visual Editor allows you to make changes to your website without writing any code. You can change text, styles, links, images, and more. To use the Visual Editor, you must first install the JavaScript Snippet or Node SDK and use makeVisualChanges() in your code. Then, install the ezbot.ai Visual Editor Chrome Extension.
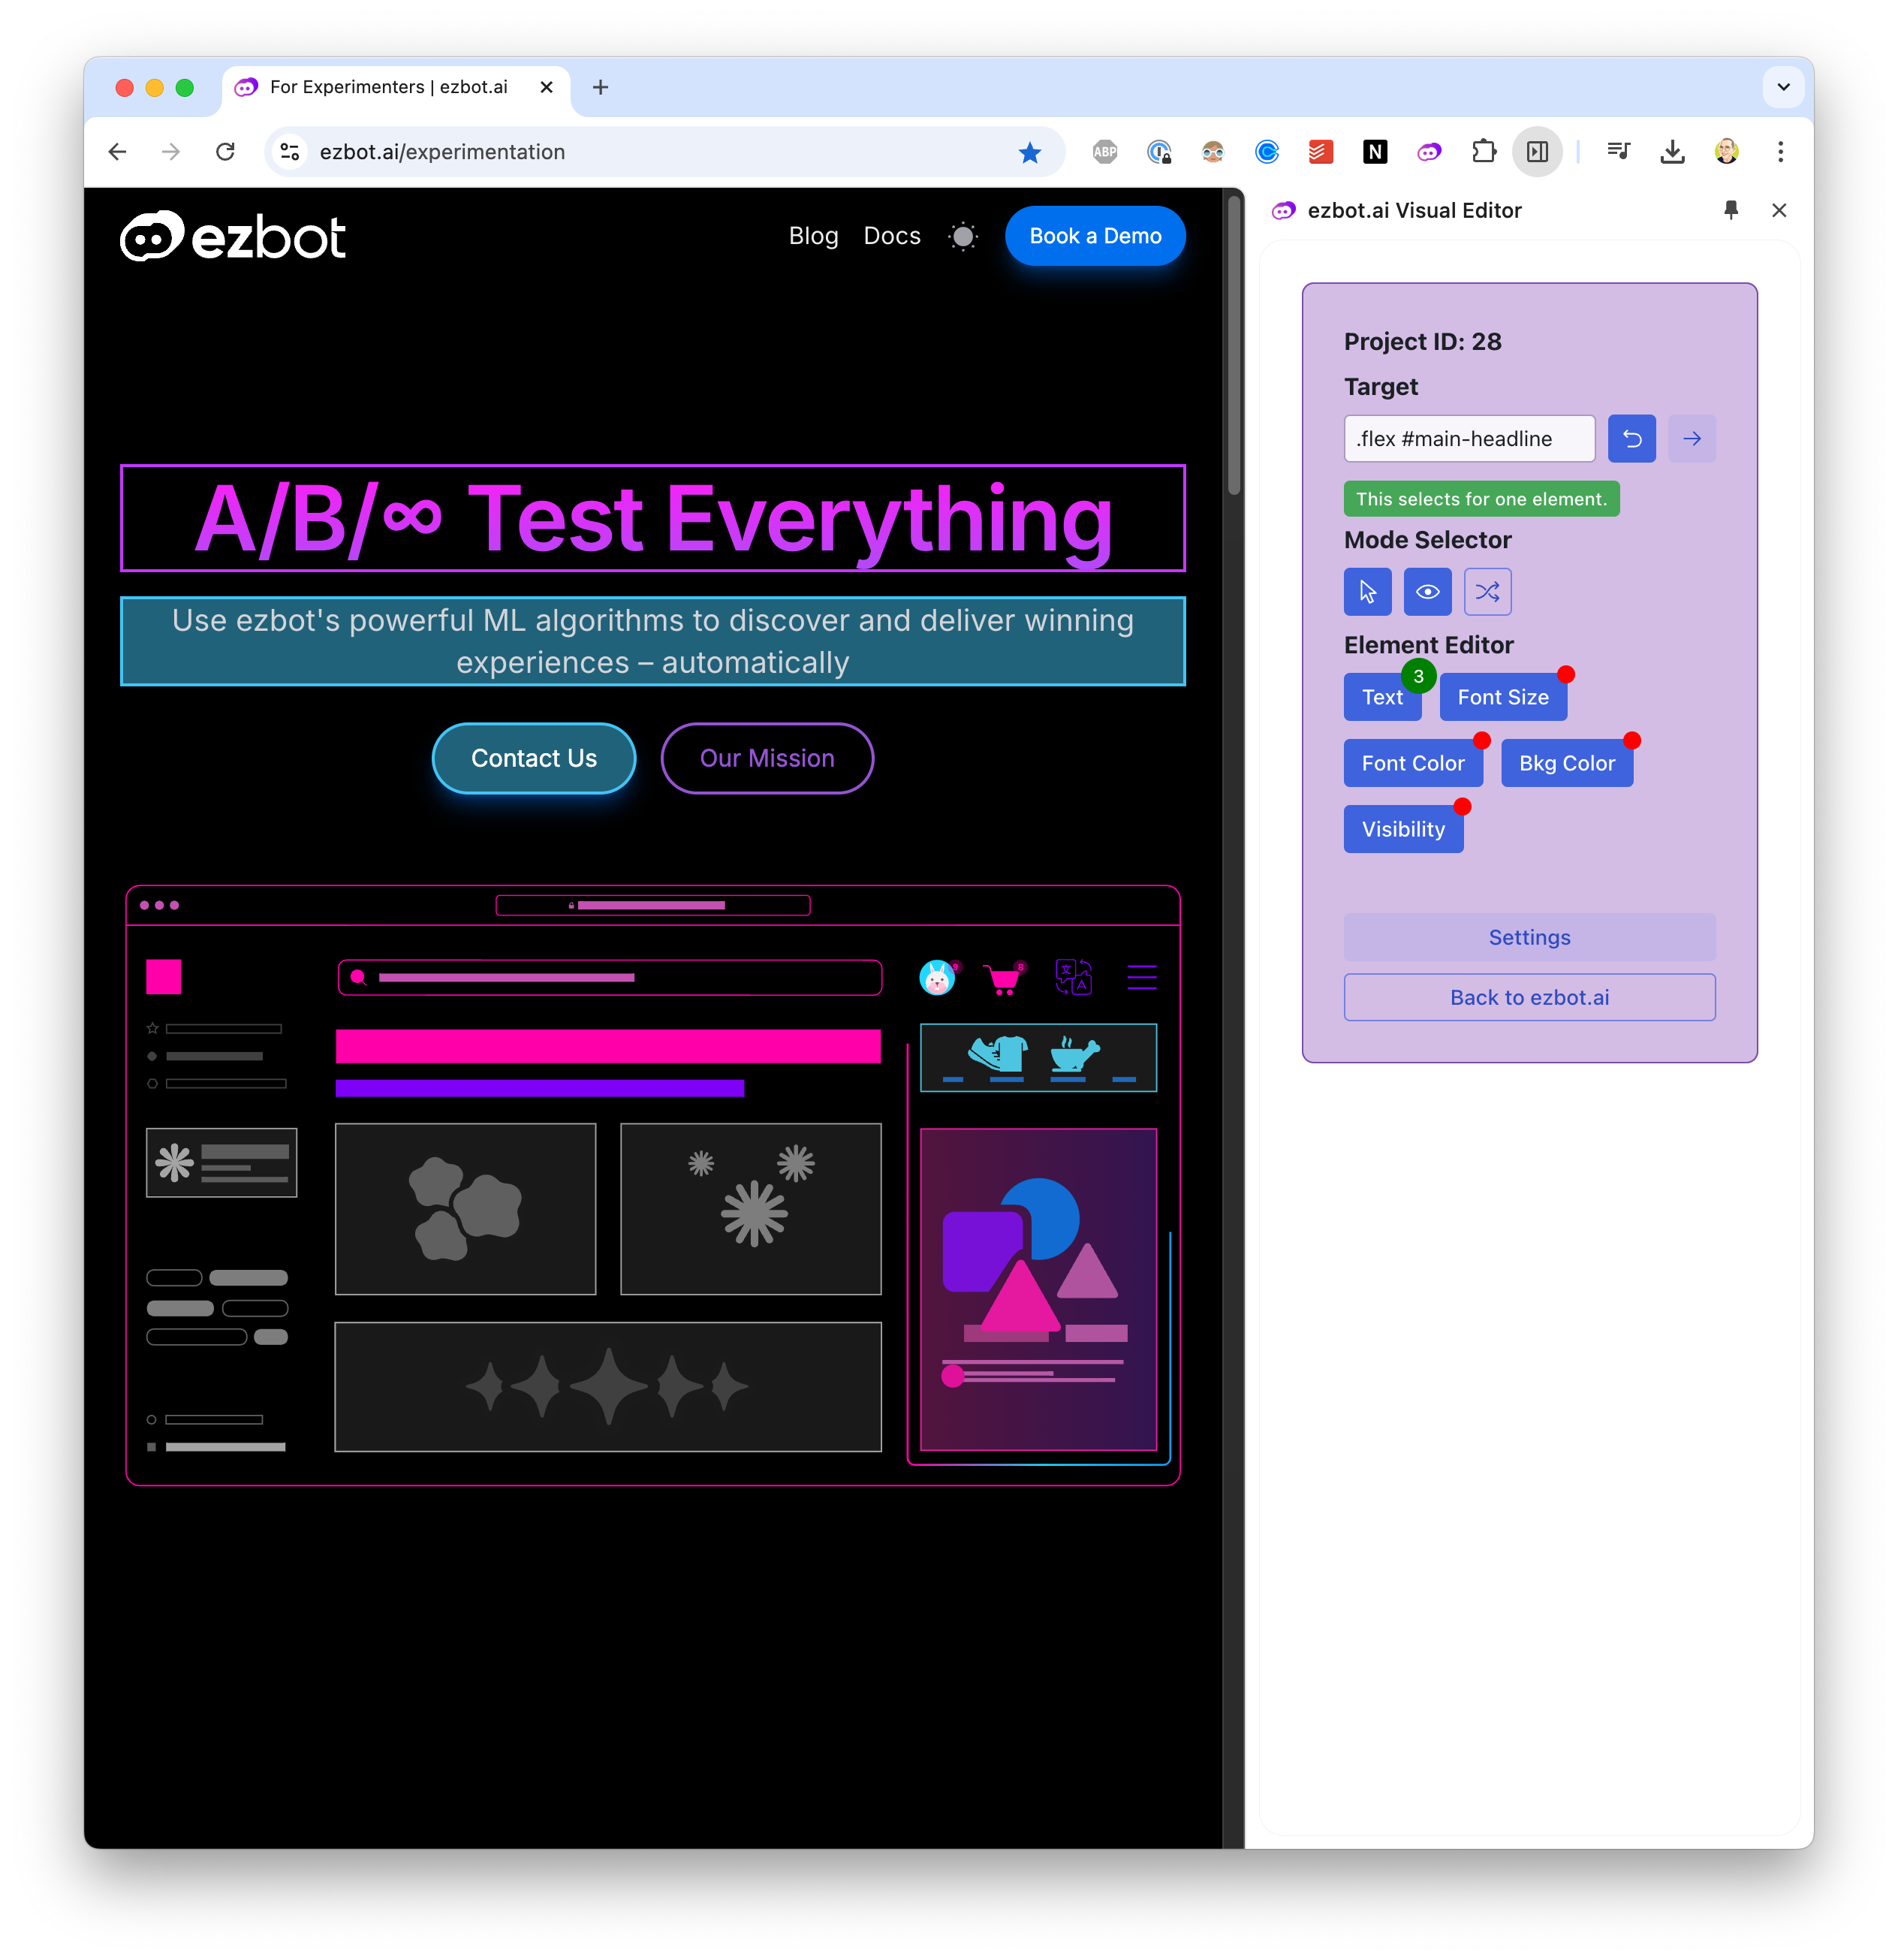
You can set the default URL for your Visual Editor in your project settings.
Modes
The Visual Editor has two modes: interactive and ezbot.
- Interactive Mode: Allows you to interact with your website as a user, useful for navigating to other pages to add or edit visual changes.
- ezbot Mode: Allows you to highlight elements on your website to make visual changes.
Highlighting
When highlighting is enabled, elements on your website that have visual changes, along with the active element you clicked on, will be highlighted in the Visual Editor. You can enable or disable highlighting by clicking the Highlight button in the toolbar.
Shuffle
When shuffle is enabled, ezbot will randomly shuffle through the variations of your visual variables to show you how different combinations will look. This is a helpful way to demo ezbot's capabilities without having to wait for users to visit your site.
Currently Supported Visual Changes
For easy visual changes, we currently support:
- Text: Change the text of an element.
- Style: Change the style of an element.
- Href: Change a link url.
- Src: Change an image source.
- Font Size: Change the font size of an element.
- Font Color: Change the font color of an element.
- Background Color: Change the background color of an element.
- Visibility: Show or hide an element.
And for ezbot users comfortable with HTML, CSS, and JavaScript, the following changes are also supported:
- Set Inner HTML: Change the inner HTML of an element.
- Set Outer HTML: Change the outer HTML of an element.
- Set Attribute: Change the HTML attribute of an element.
If you'd like to see another visual change supported, please reach out to support@ezbot.ai.
Check out our Visual Editor Guide for more information, including upcoming functionality.